Cabling A Pull-Out Pedal shelf - Suggestions?

  • Thread starter Thread starter IndyWS6
  • Start date Start date
IndyWS6

IndyWS6

Well-known member
Greetings :)
I'm starting to wire the pedals on the pull-out shelf in my rack. Obviously, there will need to be some slack in the cable bundle to allow the shelf to be extended. I have some ideas on how I can handle this, but wondered what those of you who have done it would suggest. Any tips or tricks? If you have pictures of the cable bundle in your rack, that would also be great.

Thanks in advance :rock:
 
Use George L's, zip ties and zip tie brackets.
All you have to do is leave enough slack so that the drawer can be fully pulled out.
 

Attachments

  • Rack wires.jpg
    Rack wires.jpg
    243.1 KB · Views: 3,590
Thanks for the post and the photo :thumbsup:

I'll be using Switchcraft plugs (#226 at the pedal, #280 at the GCX) and Mogami #2319 wire to build my own cables. I mounted the Pedal Power last night and routed the power cord, leaving a loop that sort of "self tucks" underneath the shelf when it is closed.

The bundle to the pedals, even with the smaller diameter wire, will be less flexible. The shelf is toward the bottom of the rack, so I can't leave much of a service loop hanging, and with the shelf extending nearly the full depth of the rack, there will be a pretty significant amount of cable hanging when it's closed. I'll be using wire ties and mounts, but I was looking for examples of how others have kept the service loop out of the way. I don't want to have to worry that it is against the power tubes, or continually push it out of the way when putting the back rack cover on, etc.

Thanks again for the post. Anyone else have some pictures or examples?
 

Attachments

  • Big Rig_093.jpg
    Big Rig_093.jpg
    263.3 KB · Views: 3,522
  • Big Rig_094.jpg
    Big Rig_094.jpg
    279.6 KB · Views: 3,467
You'd better secure that powercable to the PP. This is disaster waiting to happen. It will wiggles itself loose.

Giga
 
Giga":g5w5v1ff said:
You'd better secure that powercable to the PP. This is disaster waiting to happen. It will wiggles itself loose.

Giga
Thanks :thumbsup:
I already have - those pictures are early on in the process last night. They just seemed to show the routing of the excess power cable a little more clearly.

:rock:
 
There you go.

Another tip: keep your powercables as far from your signalcables as possible. Also, before definitively routing you cables weave your signalcables over, behind, beside your pedals to listen for artificial noise. Some seem to have a very strong field around them and routing your cables to close or under the wrong angle to them brings da noizzze und da hummmmm

Giga
 
Giga":365kwgc7 said:
There you go.

Another tip: keep your powercables as far from your signalcables as possible. Also, before definitively routing you cables weave your signalcables over, behind, beside your pedals to listen for artificial noise. Some seem to have a very strong field around them and routing your cables to close or under the wrong angle to them brings da noizzze und da hummmmm

Giga
Thanks Again :thumbsup:
All of the power cables route up the right side on the back of the rack while the signal cables route on the left side. Because of the layout of the equipment, there are a few that have to get from one side to the other to accommodate that approach, so I was careful to keep as much separation as possible. There's been a lot of work done since the photo below was taken, but it gives you an idea of how the power cords were routed. I'm pretty anal about cabling - comes from building server racks and data centers ;)

I appreciate the posts...
 

Attachments

  • Big Rig_055.jpg
    Big Rig_055.jpg
    221.1 KB · Views: 3,163
jlbaxe":1zl9njxy said:
CLEANNNNNNNN :thumbsup:
Thanks :thumbsup:
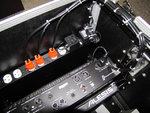
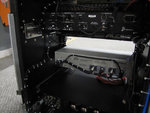
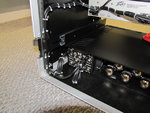
I'm a little OCD about cabling :D I also put forth some effort to make sure nothing could be easily disconnected. The first photo below was early on, so the wall wart for the effects processor isn't secured (and the power cords haven't yet been strapped to tie mounts) but you can get the idea. The second and third pictures show the audio cabling from the Eleven Rack to the EQ and then the power amp. I need to take some pictures of the innards with the flash to show the detail a little better. I'll do more of that as I wire the pedal tray...

Thanks for the posts :rock:
 

Attachments

  • Big Rig_056.jpg
    Big Rig_056.jpg
    292.6 KB · Views: 3,179
  • Big Rig_074.jpg
    Big Rig_074.jpg
    197 KB · Views: 3,182
  • Big Rig_075.jpg
    Big Rig_075.jpg
    257.7 KB · Views: 3,188
IndyWS6":2gk3h48o said:
jlbaxe":2gk3h48o said:
CLEANNNNNNNN :thumbsup:
Thanks :thumbsup:
I'm a little OCD about cabling :D I also put forth some effort to make sure nothing could be easily disconnected. The first photo below was early on, so the wall wart for the effects processor isn't secured (and the power cords haven't yet been strapped to tie mounts) but you can get the idea. The second and third pictures show the audio cabling from the Eleven Rack to the EQ and then the power amp. I need to take some pictures of the innards with the flash to show the detail a little better. I'll do more of that as I wire the pedal tray...

Thanks for the posts :rock:

I definitely would NOT use as many zip ties as you have:

- they put extra pressure on the cable if you pull them tight (which you seem to have done), which makes that point a weak spot in the cable
- IF a cable fails, it will be a MAJOR pain to undo all the zip ties to replace 1 cable

To do the shelf, I always start from the pedal side and work with the shelf pulled out completely and route the cables to the looper. I have my cable bundle secured in the middle of the shelf at the back but you can also do it at 1 side, doesn't really matter. 9v power cables won't have much influence on your signal cables if you use a quality cable for both.
 
lordriffenstein":1zhjp0ci said:
IndyWS6":1zhjp0ci said:
jlbaxe":1zhjp0ci said:
CLEANNNNNNNN :thumbsup:
Thanks :thumbsup:
I'm a little OCD about cabling :D I also put forth some effort to make sure nothing could be easily disconnected. The first photo below was early on, so the wall wart for the effects processor isn't secured (and the power cords haven't yet been strapped to tie mounts) but you can get the idea. The second and third pictures show the audio cabling from the Eleven Rack to the EQ and then the power amp. I need to take some pictures of the innards with the flash to show the detail a little better. I'll do more of that as I wire the pedal tray...

Thanks for the posts :rock:

I definitely would NOT use as many zip ties as you have:

- they put extra pressure on the cable if you pull them tight (which you seem to have done), which makes that point a weak spot in the cable
- IF a cable fails, it will be a MAJOR pain to undo all the zip ties to replace 1 cable

To do the shelf, I always start from the pedal side and work with the shelf pulled out completely and route the cables to the looper. I have my cable bundle secured in the middle of the shelf at the back but you can also do it at 1 side, doesn't really matter. 9v power cables won't have much influence on your signal cables if you use a quality cable for both.
I appreciate the comments :thumbsup:

There are certainly a lot of wire ties... But, it does ensure that the cable bundles stay in place. In my mind, using more, rather than less, helps strap the bundles securely in a way that reasonably prevents movement and minimizes the chance of a cable becoming disconnected or the insulation being cut or abraded. I'm also careful not to pull the ties too tightly, especially on the audio cables. They are just tight enough to secure the bundle, but barely tight enough to leave a mark in the insulation. I'm not overly concerned about a cable failure. It happens, but when you consider that none of the cables within the rack will be disconnected or moved on a regular basis, the chances of a failure are small. I have at least one spare for every type of cable in the rack, so if one goes south on me, I'll unplug the ends, throw in the spare and swap it permanently the first chance I get. I'm pretty handy with a pair of dykes (the mechanical kind :D ) and a handful of wire ties.

As you suggested, I plan to start at the pedal side of the cable, with the shelf extended. The issue, although not a big one, is how to deal with the excess cable that bunches up when the shelf is closed. I have some idaes, and I'm sure I can come up with a workable solution, but I was hoping to hear suggestions and see pictures of racks where others have dealt with the same thing.

Once again, I appreciate the posts and comments :rock:
 
My first rack was neat :yes: now it's looks crazy and I change it to often :lol: :LOL: I will post a pic when I get home.
 
Advice:

When you get the rack finished and just how you want it, sign off of Rig Talk. Otherwise, keep the snips handy as some cool will come along and you will either be out of rack space or want to swap something out. It goes downhill from there!

I ended up at one point with two racks, one larger rolling rack for the heads and a couple of rack spaces for power distribution. Had a second 8 space built the same size to house the other rack items and pedals.

For your shelf, go look at some pictures of Friedman's racks he has done for folks. I usually take power to one side and signal cables to the other. On your drawer, secure everything down in the drawer, then I bundle all the slack up with ties in an orderly fashion and fan them back out at whatever you are using for a looper.

More advice, rough out all your wiring first just to make sure everything works as desired and there is no hum or ground noise. Best to find a dodgy cable now that after everything is bundled and tied up. That can be an oh shit moment.

One more thing to buy is one of the Furman Plug Locks. Mount it on the inside up the side of your rack. It will take 6 wall warts and has the bar to secure them in place and plug that then into your power.

Steve
 
jlbaxe":2o1i558x said:
My first rack was neat :yes: now it's looks crazy and I change it to often :lol: :LOL: I will post a pic when I get home.

That's why I went back to a pedalboard. I got sick and tired of constantly modifying the rack thing when I had bought yet another toy.

Giga
 
Giga":2pf3yie7 said:
jlbaxe":2pf3yie7 said:
My first rack was neat :yes: now it's looks crazy and I change it to often :lol: :LOL: I will post a pic when I get home.

That's why I went back to a pedalboard. I got sick and tired of constantly modifying the rack thing when I had bought yet another toy.

Giga

Me too. The only thing that stayed the same was a Korg tuner and Furman power supply... :D

Steve
 
Thanks for the comments :thumbsup:

Signing off after the rack is done probably won't help - I'll just see someone else's rig at a club or show and the lust will begin anew :lol: :LOL: As it stands, I'll have 2U of space available for additional rack mount gear plus enough room on the shelf for 2, maybe 3, pedals. It's not a lot, but hopefully enough to keep me from re-engineering the whole damn thing in the near-future.

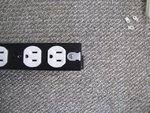
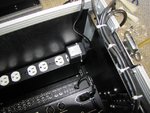
Thanks for the suggestion on roughing in the wiring before committing. I have been firing-up the rig and checking things as I make progress. I'll continue to do that as I wire the pedal tray and switcher. You can't see it in the photo, and it was taken before I finished mounting the second wall wart, but I have mounts attached to the power strip and wire ties securing them. It's a somewhat "hillbilly" approach compared to the Furman Plug Lock, but it works.

Thanks again for the posts :thumbsup:
 

Attachments

  • Big Rig_50.jpg
    Big Rig_50.jpg
    150.4 KB · Views: 3,000
  • Big Rig_51.jpg
    Big Rig_51.jpg
    100.5 KB · Views: 3,052
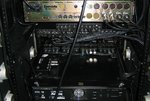
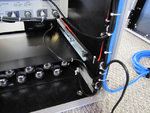
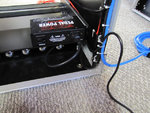
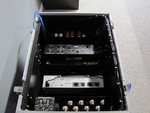
Here is some pics of my current rack. I've done a bunch of racks and you should start with the shelf pulled out. Do one cable at a time starting at the pedals. When your done one cable make sure you test it. It's easy but time consuming.

DSC_0001.jpg

DSC_0002.jpg

DSC_0004.jpg

DSC_0003.jpg
 
Immersed":2fs3csn8 said:
Here is some pics of my current rack. I've done a bunch of racks and you should start with the shelf pulled out. Do one cable at a time starting at the pedals. When your done one cable make sure you test it. It's easy but time consuming.

DSC_0001.jpg

DSC_0002.jpg

DSC_0004.jpg

DSC_0003.jpg
Care to share a pic of the front of that bad boy?
 
What about having the signalwires for the pedals coming down the middle of your left side? That way the wires will be extended both when the shelf is out and in?
 
Back
Top