Metro JTM45 kit is here! Build Progress thread..

  • Thread starter Thread starter cyndicate
  • Start date Start date
jcj":i8uhi7sd said:
Looks great, can't wait to crank that sucker up :rock:

Oh yeah....make sure to add one of those death ray type gain switches on that bad boy :D

Next time you come up, I'm putting you to work :lol: :LOL:

I'll have the 100w modded by the time I make it back up there, not sure if it will sound good though :lol: :LOL:
 
cyndicate":18x1zp44 said:
jcj":18x1zp44 said:
Looks great, can't wait to crank that sucker up :rock:

Oh yeah....make sure to add one of those death ray type gain switches on that bad boy :D

Next time you come up, I'm putting you to work :lol: :LOL:

I'll have the 100w modded by the time I make it back up there, not sure if it will sound good though :lol: :LOL:
Bring your soldering iron and some parts....you and Mark can work on it there :lol: :LOL:
 
You know....posting this kind of shit really isn't good for me.... gives me all kinds of false confidence....you know...sort of like..."well hell, I bet I could do that"..... :lol: :LOL:

I can barely change a guitar strring and just had a thought of building an amp :D :doh:
 
I've built many Metro heads and I hate to say it....................but it's addicting. :rock:
 
cyndicate":8trw3vz2 said:
JTyson":8trw3vz2 said:
Very cool, I am gassing to do a build big time :cry:

Do it! I think after this build I might tackle one of the Ceriatone ODT HRM (dumble clone) builds

If you build the dumble clone I have a new black head shell with studio slips cover for it for cheap!

Allen
 
jcj":15fyb4sf said:
cyndicate":15fyb4sf said:
jcj":15fyb4sf said:
Looks great, can't wait to crank that sucker up :rock:

Oh yeah....make sure to add one of those death ray type gain switches on that bad boy :D

Next time you come up, I'm putting you to work :lol: :LOL:

I'll have the 100w modded by the time I make it back up there, not sure if it will sound good though :lol: :LOL:

Bring your soldering iron and some parts....you and Mark can work on it there :lol: :LOL:
I would love to help work on it or even observe. :D
 
Great work man! Looks great!

Hey, tip on that solid core wire to make it straight is to take a crust roller and place the wire on hard surface and roll the wire out flat. You can also just take it and pinch it between your fingers and pull down the length of the wire as well to get the bumps out before soldering, I do that a couple times and it makes it look great.
 
jasonP":1l9kicdq said:
Great work man! Looks great!

Hey, tip on that solid core wire to make it straight is to take a crust roller and place the wire on hard surface and roll the wire out flat. You can also just take it and pinch it between your fingers and pull down the length of the wire as well to get the bumps out before soldering, I do that a couple times and it makes it look great.

Thanks for the tip! I kind of straightened it a bit after I took the picture. Didn't realize it looked so ugly before I straightened it :lol: :LOL:
 
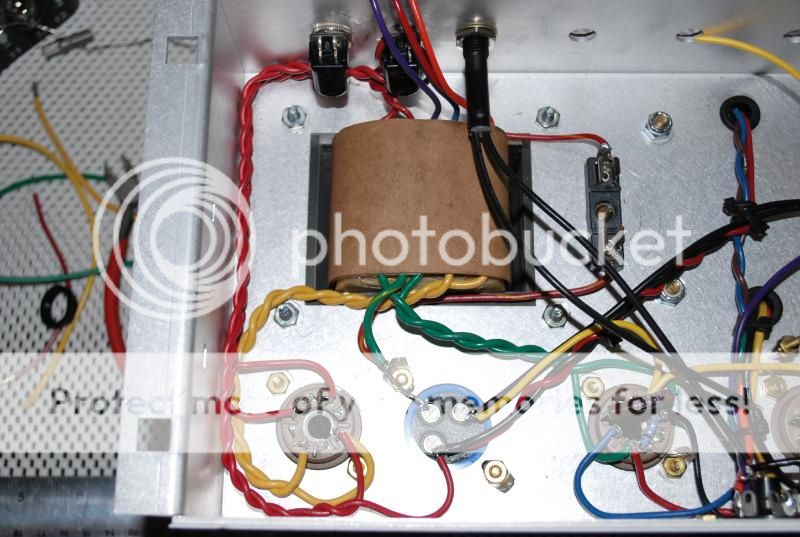
Made some more progress today! Installed the standby/power switch and wired up the remaining wires for the PT (Orange/Red) that went to the fuse holder and the power switches. The two extra blue/violet wires were taped off and heat shrinked into the corner next to the PT. Also added the internal filter cap.

#8 Standby/Power switch wired up.
DSC_0023-1.jpg


#9 Inidicator light wired up with the Orange PT wire. Note that in the instructions the PT wires are shown as all black, the new transformers included with the Kit have different color codes.
DSC_0030.jpg


#10 Extra PT wires (Violet/blue) are taped off at the end and heat shrinked into the corner. If you get to this step you notice that you have those two extra wires which are used if you are using 220v. For 120v users The only ones used are the red/orange

DSC_0033.jpg


#11 Internal Filter cap installed / Fuse holder soldered. Filtercap negative is grounded.
DSC_0035.jpg
 
Lp Freak":3ipz8z3g said:
Looks great. Is this your first build?

Yep, my first build. Trying to take it pretty slow and make it look clean.
 
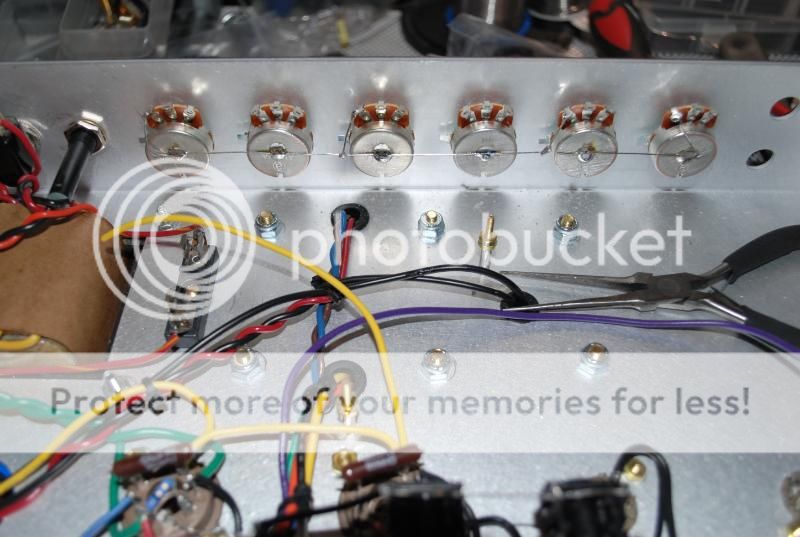
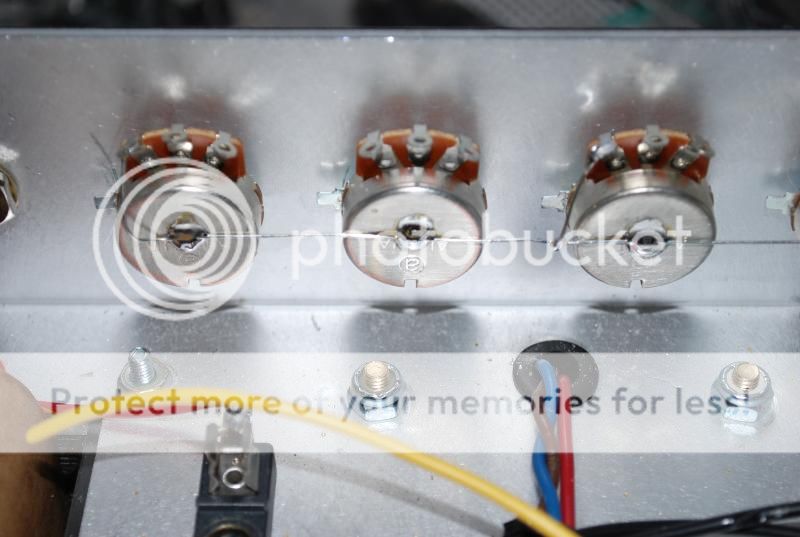
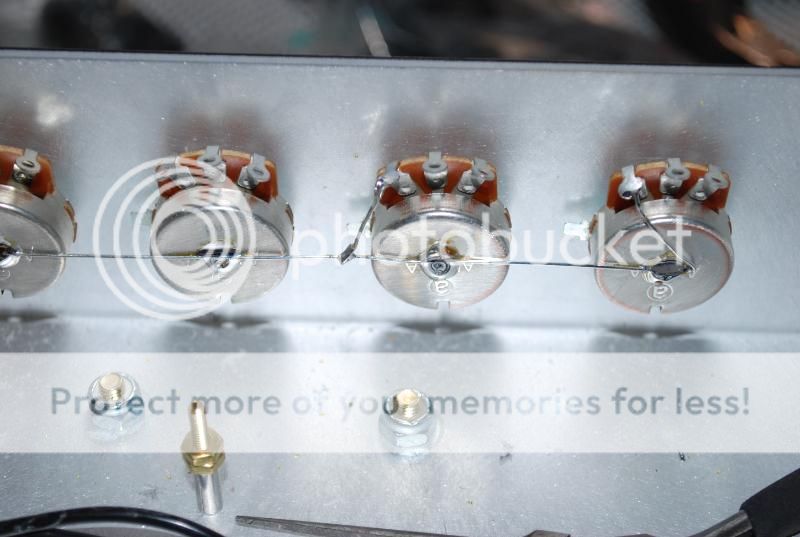
#12 Pots wired up. Note: There are two different buss wire sizes, I used the wrong buss wire for the pots, it should be the 18g buss wire (thicker one). Sanding down the back of the pots makes it way easier to solder the back of them. I would probably straighten it too if I wasn't lazy. A trick to straightening wire is to clamp one end of the wire and then get a power drill and rotate it and tug on it slowly. It should straighten it out.

Also word of advice, depending how you put on the front panel/back panel the pots usually won't line up. If you need to file use a round file and do it from the inside. Stupid me did it from the outside and I was doing it way too fast, the plexi panels scratch really easily. Now I have like 4 or 5 scratch marks on it because I was being a idiot :lol: :LOL:

DSC_0030-1.jpg


DSC_0031-1.jpg


DSC_0032-1.jpg
 
R u sure u used the 18 gauge buss wire for grounding the pots? It looks like the thinner 22 gauge.
 
johnnyjellybean":3v5z7rou said:
R u sure u used the 18 gauge buss wire for grounding the pots? It looks like the thinner 22 gauge.
+1
 
Looks great, I always want to do one of these but I know it would take forever to complete.
 
johnnyjellybean":2zml1xil said:
R u sure u used the 18 gauge buss wire for grounding the pots? It looks like the thinner 22 gauge.

Crap I think you are right! :doh: Looks like I'll fix it tonight when I get home from work. Thanks for catching that, for some reason I always forget the lower the gauge # the thicker it is, will probably back track and make sure I didn't switch those two anywhere else.
 
Digital Jams":1t3cpkbt said:
Looks great, I always want to do one of these but I know it would take forever to complete.

Thanks! It's actually not that bad once you get it going, I have about 4-5 hours in it now, I think i've read that the build will probably take about 10-15 hours total
 
cyndicate":20oi9oq5 said:
Digital Jams":20oi9oq5 said:
Looks great, I always want to do one of these but I know it would take forever to complete.

Thanks! It's actually not that bad once you get it going, I have about 4-5 hours in it now, I think i've read that the build will probably take about 10-15 hours total
I've built four of them now and pretty much got it down pat. The last one I started on Friday after work and was playing it Sunday evening. Now that's definately snortin' a lot a solder fumes. :rock:
 
Back
Top